Introduction: Your Soundbar Deserves Better Than Sitting on a Cabinet
A soundbar can completely transform the way your TV sounds — but only if it’s positioned correctly.
In 2026, more Australian homes are switching to soundbar wall mounting because it improves audio clarity, frees up space, and delivers that sleek, cinema-style finish.
But here’s the thing: mounting a soundbar isn’t just “attach a bracket and hope for the best.”
If you want perfect audio, perfect alignment, and a safe long-lasting setup, you need to follow the right tips.
Here are the Top 10 soundbar wall mounting tips every Aussie home should know in 2026.
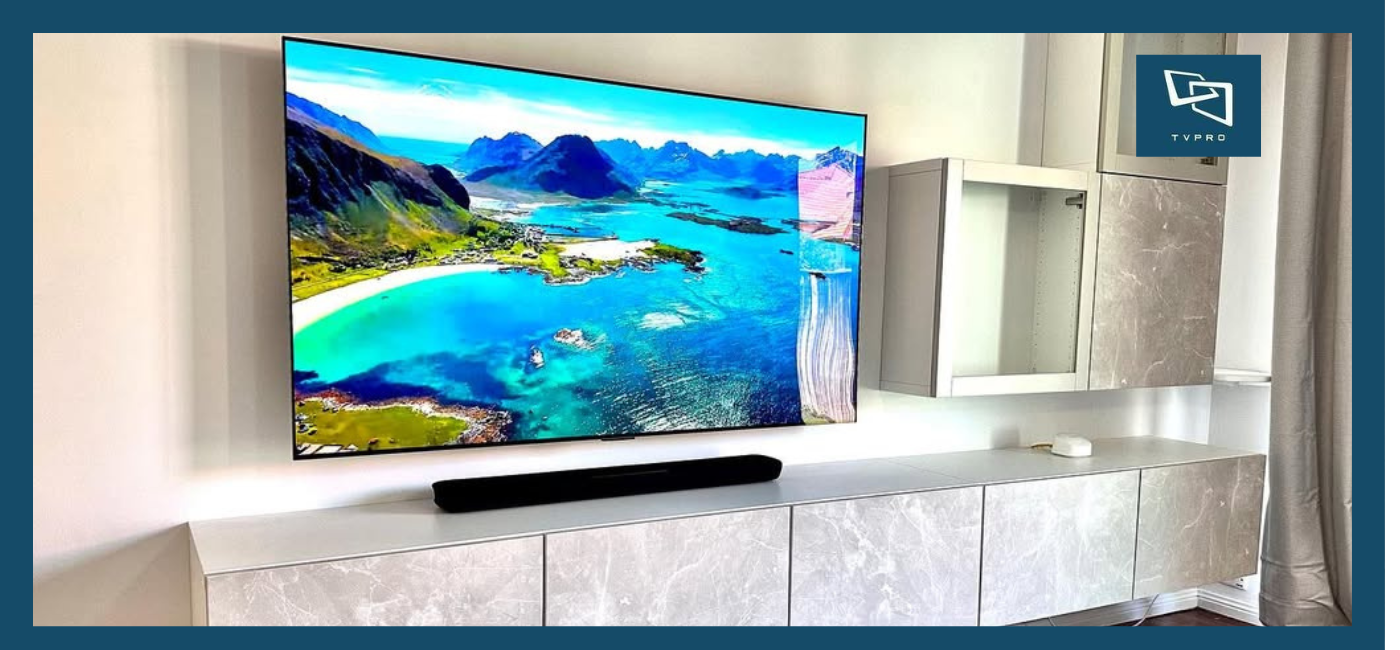
1. Mount the Soundbar Directly Under the TV — Not Too Far Apart
The golden rule:
The distance between the TV bottom and soundbar top should be 3–7 cm.
Why?
✔ Keeps audio synced with on-screen action
✔ Looks clean and balanced
✔ Prevents sound delay perception
✔ Ideal for Dolby Atmos, DTS, and surround formats
Mounting too far away breaks the immersive experience.
2. Follow the TV Size: Bigger TVs Need Slightly Wider Placement
For 55–65 inch TVs:
✔ Mount soundbar exactly centred, slightly below screen
For 75–85 inch TVs:
✔ Consider a slightly wider bracket alignment to balance proportions
Professionals match placement with the TV’s width so everything feels visually harmonised.
3. Keep the Soundbar at Ear Level When Seated
This tip separates amateurs from professionals.
Ear-level = better dialogue clarity.
Too high = sound shoots above you
Too low = sound hits your knees
Centered = perfection
For most Australian loungerooms, seated ear level sits between 95–110 cm from the floor.
4. Use the Right Bracket — Never Force a Universal One
Soundbars vary massively:
- Sony
- Bose
- Sonos
- Samsung
- LG
- JBL
- Polk
Each brand often has:
✔ Different mounting points
✔ Different screw sizes
✔ Different weight balance
✔ Different depth/height
A universal bracket can work — but only if it matches the model perfectly.
Pros always choose the correct mounting hardware to avoid wobble or tilt.
5. Avoid Covering Ports, Vents, or Side-Firing Speakers
A soundbar must “breathe.”
Blocking:
❌ Air vents
❌ Side speakers
❌ Upward Atmos speakers
❌ Cable ports
…will destroy sound quality (and can cause overheating).
Always ensure:
✔ 3–5 cm clearance for ventilation
✔ Enough space for HDMI eARC and optical cables
✔ Side speakers remain unobstructed
6. Don’t Mount on Weak Plasterboard Without Reinforcement
A plasterboard-only installation is a disaster waiting to happen.
Soundbars may seem light, but combined with:
- Bracket weight
- Cable tension
- Daily vibration
- TV mount proximity
…it can rip straight out of hollow plasterboard.
Professionals locate:
✔ Timber studs
✔ Metal studs
✔ Structural points
✔ Reinforcement options
Correct anchoring = safe, stable audio.
7. Hide Your Cables — Because Clean Aesthetics Matter
A soundbar wall mount looks premium ONLY if the cabling is clean.
Best cable management options:
✔ Behind-TV cable routing
✔ In-wall pass-through plates
✔ PVC channels painted to wall colour
✔ Slimline conduits
✔ Velcro ties & clips
✔ Integrated cable sleeves
A clean setup boosts both style and safety.
8. Match the Soundbar Height to Room Acoustics
Every living room is different:
- High ceilings
- Carpet vs timber floors
- Open-plan spaces
- Narrow TV rooms
- L-shaped lounges
Pros adjust soundbar height to optimise:
✔ Dialogue clarity
✔ Bass delivery
✔ Surround sound effect
✔ Room echo control
What works in one home won’t work in another.
9. Ensure the Soundbar Doesn’t Block Remote Sensors
This tip gets overlooked constantly.
If the soundbar blocks:
- IR sensors
- TV bottom sensor bar
- Ambient light sensors
…your remote may stop working properly.
Leave a 1–2 cm gap so nothing interferes.
10. Always Align Using a Laser Level — Never by Eye
Eyeballing leads to:
❌ Tilted soundbar
❌ Uneven gap between TV and bar
❌ Crooked angle
❌ Terrible visual balance
Professionals use:
✔ Laser levels
✔ Vertical/horizontal crosslines
✔ Micro-adjustable brackets
Perfect alignment = premium look.
Bonus Tip: Pair Soundbar Wall Mounting With a Subwoofer Placement Plan
Most Australians put the subwoofer anywhere it “fits” — but placement is everything.
Ideal locations:
- Corner behind couch
- Along a side wall
- Under a media bench (open front)
- Behind TV (for compact subs)
Never block the subwoofer’s bass port.
Professionals tune the full setup for best acoustics.
Conclusion: A Well-Mounted Soundbar Makes All the Difference
Soundbars are built for precision audio — but they only shine when mounted correctly.
With the right placement, bracket, alignment, and acoustic planning, your living room transforms into a mini home theatre.
Follow these tips or let a professional installer handle the job for:
✔ Perfect audio
✔ Perfect alignment
✔ Clean aesthetics
✔ Safe mounting
✔ Maximum performance
A good soundbar deserves a great setup — and 2026 is the year to upgrade your entertainment space.